Make Your Own Nature Brushes and Paints
Making your own paint brushes is an easy eco-friendly activity for kids. Get them outside to collect as many natural materials they can find.
Mother Nature shows us all the time what an amazing artist she is. Your kids can channel her talents when they make DIY nature brushes and paints.
As a former art teacher, I reveled in preparing these activities because there are so many varied points of interest that capture a child’s fascination.
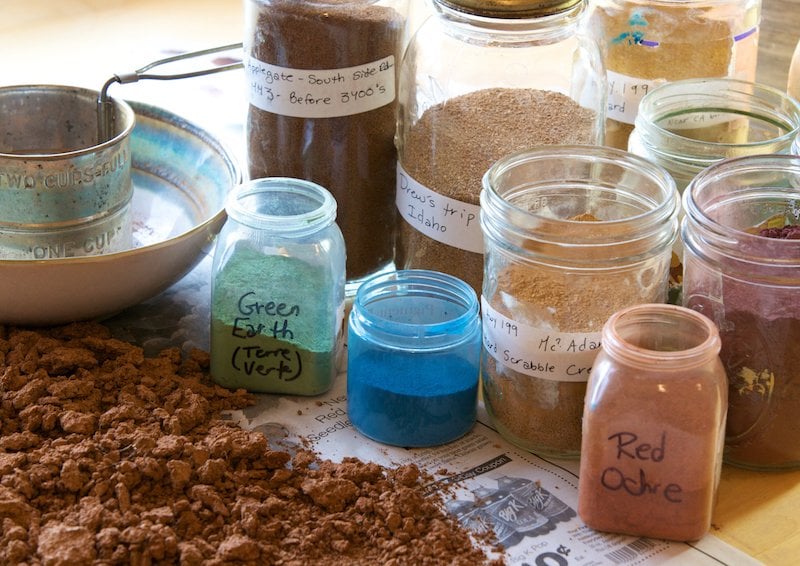
Using natural earth pigments (which are the most archival and radiant pigments available), mixed with a natural binder such as oil, eggs, tree sap or milk, allows anyone to create their own high quality, natural and beautiful paints.
A general assumption is that earth pigments only come in different shades of brown. They actually come in a huge rainbow of hues – red, orange, yellow, green, blue, purple, black, white, gold and more.
These paints can be made by children ages three and up, and I’ve always relished that spark in their eyes as they exclaim, “We’re making paint from dirt!”
Most people don’t realize how simple paint is – simply pigment mixed with a “binder” – and how satisfying it is to make it from scratch instead of the disconnect of squirting some neon paint out of a bottle.
Historically, all paint was natural
Starting at least 100,000 years ago, ancient people from all over the world, including Egyptians, Native Americans, ancient Buddhists, Medieval monks, and Renaissance masters used earthen pigments to make their paints. Humans on almost every continent ground up earthen clays and minerals and mixed them with a binder such as honey, blood, tree sap, grease, eggs or oil.
About a hundred years ago, this tradition almost disappeared with the introduction of synthetic pigments and petroleum-based paints. With the invention of ready-made tubed and bottled paints, toxic preservatives were added to paints. The most common preservative today for “non-toxic” children’s paints is surprisingly formaldehyde.
How to make your own nature brushes and paints
You can see why I’m on a mission to bring back this ancient and eco-friendly practice of making your own high quality and sustainable paint. Paints are made from two things: pigment and a binder. Pigment is the color, and the binder helps it stay on the surface.
Nature-Based Art Activities
Project 1: Make your own nature brushes
Materials:
- twigs for stalks
- or try soft plant stalk like yucca, iris, cattail stem, mullein, etc.
- pine or spruce needles, cypress foliage, tree buds, etc.
- string or twine
- optional: rubber band
Note: Carefully plan this nature walk to include areas with access to interesting potential paintbrush material. As you start your walk together, explain that pre-made paintbrushes have been around for a few hundred years, while our ancestors have been painting for more than a hundred thousand years with nature-found brushes. See if your child naturally gravitates toward pine needles, cattails, grasses, or mullein they see.
Directions:
- Break or cut plant stalks into pieces about 4 – 6” long. Yucca is my favorite!
- Try breaking up the fibers at one end of the stalk by mashing it with a rock or chewing on it. Try to separate the fibers into a brush-like end. I like to use my thumb fingernail to scrap the green coating away.
- If using twigs as the handle, wrap the bristle material evenly around the stick and attach by wrapping twine or rubber bands around it.
- Encourage children to get creative and find other nature objects to paint with– use one single plant fiber or pine needle for details, use large seed pods or nut shells for stamping, etc.
DIY Natural Paint Recipes
“What You Find in Nature” Paint
Ingredients
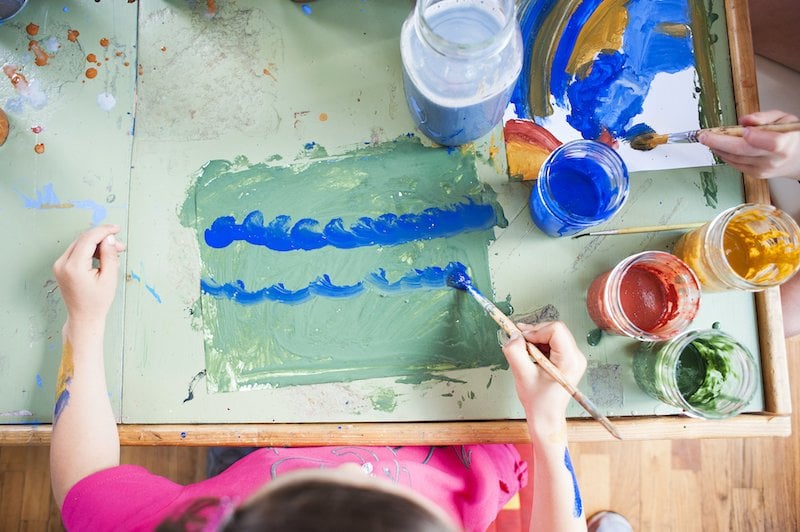
Use what you find outside or from your local farmer’s market. These create primary colors. Your child will enjoy mixing them to see what other colors they can make.
- Blue – blackberries, blackcurrants, blueberries
- Red – beetroot, rose petals, cranberries, strawberries
- Yellow – mustard powder, pumpkin, bee pollen
Directions
- Push berries or other soft fruit through a sieve to extract your pigment, then mix with just a small splash of water.
- Grind petals, leaves, or other dry items before mixing with a tiny, tiny bit of honey.
- Powders are the easiest. Just mix powders like mustard powder in water being super careful to add just the right amount.
- Don’t use so much water that it’s super runny, but you want enough so that it’s not grainy. (source)
Natural Milk Paint
Ingredients
- Natural Earth Pigment (buy as a set or the colors you choose)
- Milk powder
- Water
Directions
1. Mix 1 part pigment to 1 part milk powder (with whisk or slotted spoon). Mix slowly to avoid dust in the air
2. Add 1 part water to 1 part powder mixture. Adjust amount of powder and water to desired thickness. For more watercolor effects, add more water
3. Mix what you’ll use in each session. If there is leftover mixed paint, store in the refrigerator.
Natural Egg Tempera Paint
Tempera painting predates oil painting as a professional painting medium. It was used by medieval monks in their Illuminated Manuscripts and has been used throughout the centuries. It produces a crisp, luminous, water-soluble, and fast drying paint.
- egg yolk
- water
- Natural Earth Pigments
- Optional – gold mica powder
1. Break open an egg, separating the yolk from the white. Keeping the yolk whole, dry it by passing it back and forth in the palms of your hands with a paper towel.
2. Hold the yolk over a dish or jar with your thumb and forefinger, and pierce the sack to allow the contents to flow out. Discard the empty sac.
3. Mix yolk with earth pigments in a bowl, and use water to thin the paint. Optional: A drop or two of Clove Oil can be added to slow spoilage if it will be stored. Tempera paint does not store well once mixed, so paint away!
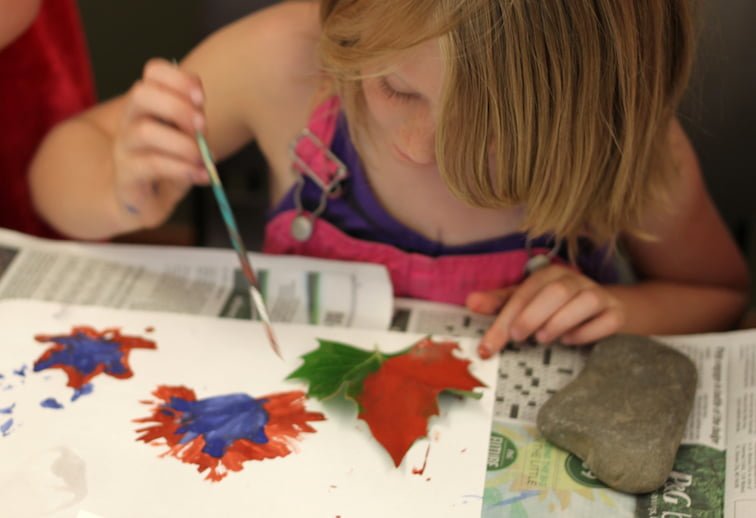
Project 2: Create nature prints
Materials: fresh leaves (maple are my favorite), Earth Paint, newspaper
1. Paint one side of leaves, lay face down on paper.
2. Place sheet of newspaper on top and rub with your hands.
3. Lift up newspaper & leaves.
4. Make wrapping paper, greeting cards, book covers, decorative bags or a banner.
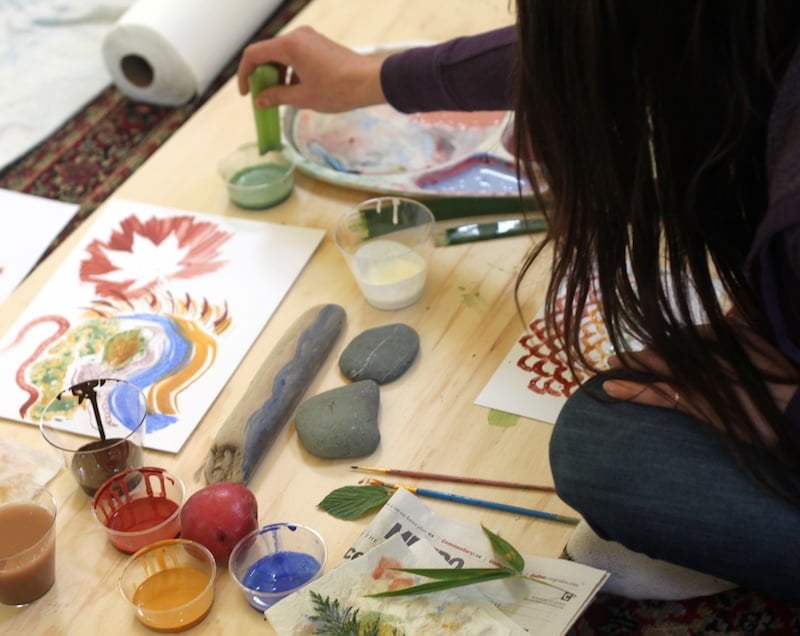
Project 3: Make Aboriginal art
Paint flat rocks with Earth Paint – copy Aboriginal patterns and incorporate a lesson about their history and annual sacred pilgrimages to collect natural pigments.
Project 4: Recreate cave paintings
Re-create the famous pre-historic paintings of hand prints, animals and symbols with earth-based paints and incorporate lesson behind the mysterious meanings of these paintings.
How pregnancy inspired an interest (& necessity) for safe paints
As a professional oil painter and art teacher, I had always painted in the techniques I was taught in art school — with heavy-metal-laden paints full of toxins and an off-gassing jar of mineral spirits nearby.
After 15 years of painting like this, I was offered the opportunity to create 25 large scale paintings for a one-woman show. The show would open one week before the due date of my first child. When it hit me that I would need to paint every day throughout my entire pregnancy, I decided rid my studio of all toxins.
I dove into research on the ancient techniques of painting that are completely natural, and to my surprise, they turned out to the highest quality ingredients in the world. I studied the cave paintings all the way to the Old Masters of the Renaissance and realized they were all using the same earth-friendly paints!
Commercial “non-toxic” kids paints are filled with preservatives and chemicals. What could be more natural than painting with the actual earth? We source our clay and mineral pigments sustainably from the environment. We dry, grind, sift, and combine them with a milk powder binder.
After one year of using these natural supplies for myself and my son, I realized that it was my mission to educate all artists and provide natural and non-toxic art supplies to the world. A few months later, my business, Natural Earth Paint was born.
Images by Michaela Begg